First Course Of Bevel Siding

Bevel Siding Bevel Siding Prices Patterns Pictures

Wood Siding How To Part A Installing Bevel Siding Old House Web

All About Rainscreens House Cladding Installing Siding Rustic Basement

Installing Western Red Cedar Bevel Siding Real Cedar
Exterior Bevel Siding Library Builder

How To Buy Wood Board Siding Wood Siding House Wood Siding Exterior Wood Sideboard

Siding may be installed starting with the bottom course.
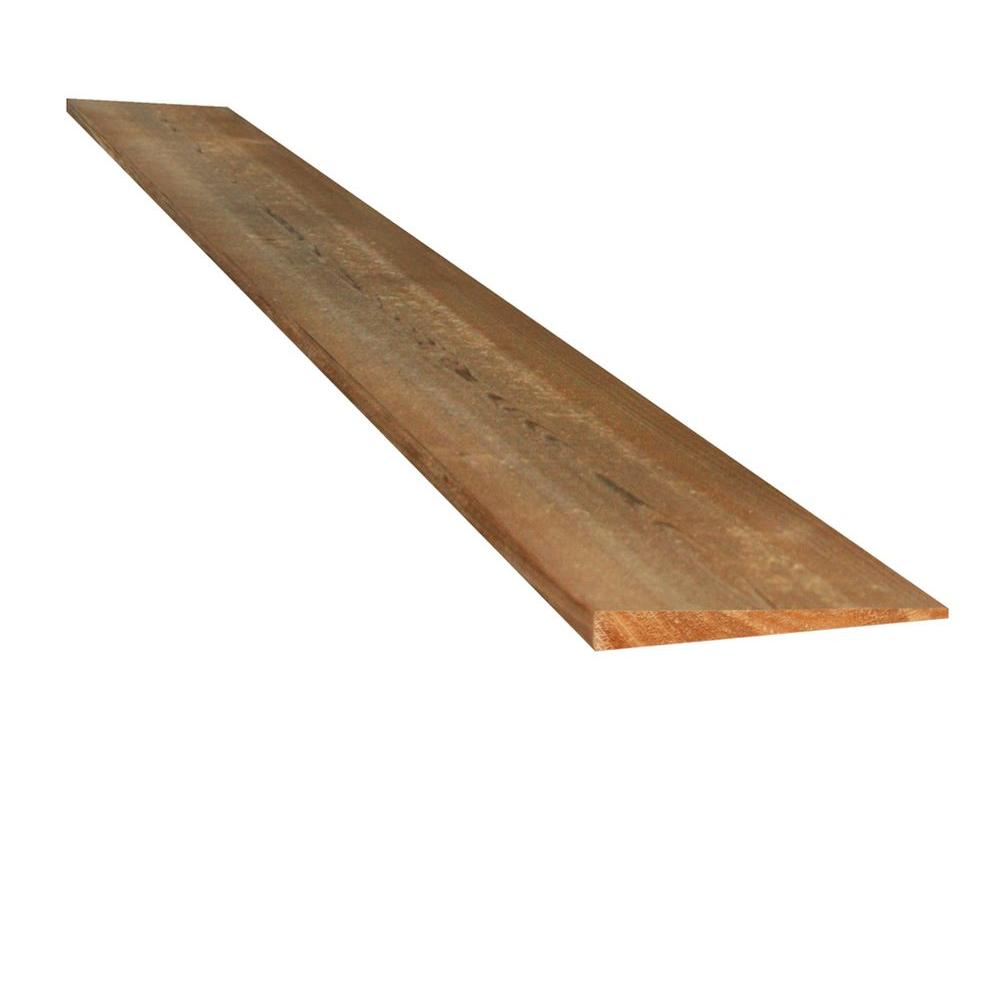
First course of bevel siding. One edge has a thick butt while the other edge is thinner. The manufacturing process results in pieces with one face saw textured. The rabetted bevel dolly varden pattern features a 1 2 3 4 notch in the thicker butt end of the board this rabbeted edge cut allows the bevel siding panels to fit together in such a way as to protect joints from water infiltration. Bevel siding also referred to as clapboard siding is a very popular wood siding product.
It is produced by resaying lumber at an angle to produce two pieces thicker on one edge than the other. Step 8 siding beside windows photo by david carmack. Carefully slide the notched piece of siding into place. Align the bottom of the bevel plank with the bottom of the starter strip with the end flush against the trim and.
On rabbeted bevel siding leave a 1 8 inch expansion clearance. The dolly varden rabbeted bevel profile is an easier install while providing the same traditional bevel style and appearance. Place the nail just above the overlap. Fasten bevel siding in place using one nail per bearing or stud spaced a maximum of 24 inches on center.
For bevel siding this is a minimum of 1 inch. Join the clapboards with scarf joints as in step 3. Bevel wood siding provides rustic warmth for homes and log cabins. Clapboards have a triangular cut.
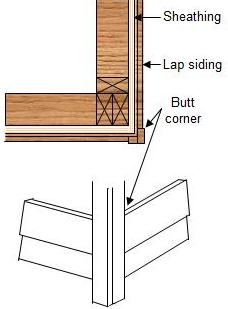
It is normally blocked out with a starting strip the same thickness as the top of the siding board see figure a. The most familiar type of wood siding is the clapboard a form of lap siding that s also called bevel siding. Set the first bevel board in place against the trim at a corner of the house. Nail the clapboard to the studs.
Thinner at the top and wider near the lower more exposed part of the board. The number of board spaces between the soffit and bottom of the lowest piece of siding at the foundation should be such that the overlap is as per the table. If more than one clapboard is needed to span a wall snap a chalk line between the marks on the corner boards on top of the course being overlapped. Start with the bottom course using a furring strip to support the lower edge.
When installed it is nearly impossible to tell the difference between dolly varden and bevel or clapboard siding. Each succeeding course overlaps the one below. Make sure the first course is level. Click here to read a short course on cladding part 2.
Each succeeding course overlaps the upper edge of the lower course. They are lapped to shed water. This is the first of a 2 part series. With dolly varden siding you get the appearance of bevel and clapboard siding but the convenience of self spacing thanks to the rabbet at the bottom to accept the top of the preceding course.
Western red cedar bevel siding is the most widely used siding type.

Do It Yourself Cedar Siding Extreme How To

Cedar Bevel Siding Western Red Cedar Shiplap Knotty Gorgeous Cedar Siding Cedar Siding Maintenance Cedar Siding Repair
5 8 In X 6 In X 8 Ft Green Western Red Cedar Bevel Siding 0513228 The Home Depot

Wavy Edge Cedar And Steel Siding Google Search Steel Siding Cedar Siding House Siding

Pin By Distinguished Boards And Beams On Home Rustic Lap Siding Installing Siding Installing Wood Siding

Preparing Installing Cedar Columbia Cedar Inc

How To Install Cypress Bevel Siding Wood Siding Exterior Installing Wood Siding Wood Siding

Board Batten Wood Siding Simple And Inexpensive Options Board Batten Wood Siding Simple And Inexpensive Op Wood Siding Options Wood Siding Wood Siding Types

1x10 Bevel Siding No Rabbet Profile Clear Cedar 3 Coat Factory Finish Home In New York Siding Prices Clapboard Siding Cedar Siding

Correct Nailing Of Lap Siding Clapboard Siding Exterior House Siding Lap Siding

Exterior Siding Western Red Cedar Clear Stain Bevel Exterior Siding Exterior Siding Options Cedar Siding

Pin Van Jacquelyn Pratt Op House Houten Gevelbekleding Gevelbekleding Tuinhuizen

Pin On For The Home

Siding Patterns Wood Siding Pattern Diagrams And Pictures

Decorating With Shutters House Siding Options House Exterior Colonial Style Homes

Bevel Siding Affordable Bevel Siding Prices Bevel Siding Pictures Siding Prices Cedar Siding Cedar Clapboard Siding

Janss Lumber Siding Cedar Siding Exterior Siding Siding

Wood Siding A Visual Guide To Siding Options Colonial House House Exterior Home Additions
Https Encrypted Tbn0 Gstatic Com Images Q Tbn 3aand9gcqh0c3mje4z4eyiptkjgosjqillmuzod10q7uvy4uho6f0dyytu Usqp Cau

Wavy Edge Bevel Siding Pattern Sample Pattern Pictures Cedar Siding Siding

What Angle Do You Set Your Saw To Cut Corners On Bevel Cedar Siding Windows Siding And Doors Contractor Talk
In The 1960s Was The Siding On American Homes Made Out From Vinyl Or From Something Else Quora

Soffit House Exterior Framing Construction Exterior Remodel
How To Install Wood Lap Clapboard Or Beveled Siding Part 3
Romtec Inc Photo Gallery Mountain Resort House Styles Resort

Tongue Groove Siding T G Siding Prices Patterns Pictures Siding Exterior Siding Cedar Siding

Contact Buffalo Lumber Custom Lumber Quotes

Cedar Siding In Sawmills And Milling

Pine Board And Batten Bevel Siding Cove Siding Clap Board Ship Lap Cedar Maibec Fraserwood Prefinished V Groo Cedar Homes House Siding House Exterior

Cedar Creek Lumber Home Cedar Homes Western Red Cedar Cottage Inspiration

Cedar Bevel Siding Is So Great For Exterior Siding It S Easy To Install And Looks Great Bevel Cedar Siding Cedarsidin Cedar Siding Exterior Siding Siding

Cedar Siding Cedar Siding Prices And Pictures Log Cabin Siding Cedar Siding Log Siding

Cedar Wavy Edge Lap Siding In Custom Finish Cedar Siding Colors Cedar Siding Wood Siding Exterior
Ce Center

More Ideas Below Exterior Board And Batten Siding Diy Board And Batten Siding With Brick Fa Wood Siding Exterior Exterior House Siding Exterior Siding Options

A Quick Guide To Sealing Cedar Siding Learning Centerlearning Center

Manufactured Stone Siding Causing Big Problems For Homeowners Manufactured Stone Stone Siding Stone Veneer Exterior
What Size Nails Do You Use For Pine Siding Quora

Vinyl Foundry Jpg 961 550 Pixels Vinyl Shake Siding Vinyl Siding Siding

How To Build A Shed How To Install Fascia Boards T G Soffit Boards On The Shed Video 11 Of 15 Youtube Diy Shed Plans Building A Shed Shed

Roundwood Timber Frame New Course Blog From The Centre For Alternative Technology Wood Frame Construction Timber Frame Timber Frame Building

Anyone Ever Milled Lap Siding At Home Page 2 Arboristsite Com

