Flashing On A Shingle Roof

Details That Matter On Asphalt Shingle Roofs Roof Installation Roof Shingles Roofing

Pin On Deck Roof

How To Re Shingle A Roof And Not Die Diy Roofing Roofing Home Improvement Projects

Pin On Back Porch

Pin On Roof

Cricket And Stepflashing Masonry Chimney On Shingle Roof Roofingideas Home Construction Roofing Building A House

Get the real story about drip edge placement.
Flashing on a shingle roof. Sweep the roof clean removing any nails and debris left behind. This drip edge flashing provides protection from water damage along the eaves and rake of a roof. Step flashing protects the gap where roofs meet walls by weaving into the roof shingles. Use caution so you don t damage any windows or siding in the process.
Does the drip edge metal go under the tarpaper ice and water shield or underlayment on the eave. Secure a shingle over the corner flashing using a hammer and roofing nail. The flashing should partially overlap the shingle that covers the first piece of flashing. Rain should run off the roof and into the gutter.
Place a second piece of 8 inch 20 3 cm flashing against the chimney. You can keep any flashing that is in good shape but we recommend replacing it all with new flashing. Hammer 2 roofing nails into the flashing and roof. Gibraltar drip edge flashing can be used with asphalt shingles or metal roofing panels.
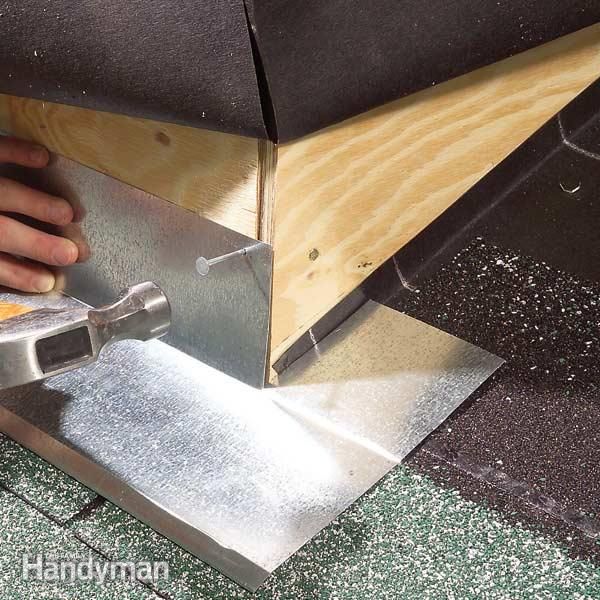
Install your underlayment completely and your shingles up to where the wall begins so that the first piece of flashing or the corner flashing will rest on a shingle. The extra kick at the bottom of the face directs run off away from the structure. Remove the metal flashing. Bring a trash can up on the roof so you have a place to throw old shingles and flashing.
At the bottom of the roof water needs to be directed. To make corner flashing take your tin snips and cut a 45 degree line from an outside corner to the center fold. Secure a shingle over the second piece of flashing with a nail.

Pin On Roof

Pin On Exterior Paint And Roof Ideas

10 Roof Problems And What To Do About Them Roof Problems Home Repairs Leaking Roof

How To Shingle A Roof 90 Pics Pro Tips Recommendations Roofing Shingling Roof

Pin On Projects Garage

Pin On Darn Roof

How To Roof A House Diy Roofing Roofing Home Construction

Pin On Metal Roof

Pin On Roof

Pin On Construction Details

Pin On Are Test Prep

Pin On Roofs And Gutters

Pin On Roofing Tips And Ideas

The Importance Of Choosing The Right Roofing Contractor Roofing Design Guide Metal Roof Roof Roof Shingles

Pin On Are Bdcs

Pin On Roofing Tips And Ideas

Pin On Metals

Pin On Shingle Roof Repairs
3

Pin On Kik Messenger

Pin On Idei

Pin On Wood Road

Pin On Informative

Pin On Home Exterior Ideas

Pin On Roof Flashing

Pin On Commercial Roofing

Disadvantages Of Asphalt Roofing Classic Metal Roofs Llc Metal Roof Cheap Roofing Roofing

Diy Roof Maintenance Checklist And Roof Repair For Shingles With Photos Part 2 Installing Shingles Roof Maintenance Roof Repair

Pin On Metal Roofs

Pin On Roofs And Gutters
Pin On Construction

Pin On Roof Maintenance

Pin On Metal Roofs Being Installed

Pin On Houuuuuuuse

Pin On Roofing

Article About Framing A Roof Saddle To Prevent Water Leakage Where The Roof Meets A Chimney Building Roof Roof Repair Roofing
Pin On Remodels And Renovating

Pin On Copper Metal Work

Mastering Roof Inspections Roof Penetrations Part 2 Roof Roof Restoration Copper Roof

Residential American Roofing Metal American Roofing Metal Roof Roof Renovation

Pin On Diy Deck

Pin On Water Proofing

